Video transcriptA Quick Look at Our Duct Cleaning Process
Okay, you took the first big step: you scheduled your air duct cleaning. Congratulations. This video will walk you through our air duct cleaning process so you know what to expect next. First, our team of trained NADCA-certified technicians will bring our state-of-the-art equipment to your house. When they greet you at the door, they will always be in uniform and will professionally offer their identification.
Before we can begin the cleaning process, we will cover all the registers with special non-damaging tape to increase the powerful vacuum's effectiveness. Once all the registers are covered, the ductwork and air returns are thoroughly cleaned using various agitation tools and brushes. We don't stop there. Our technicians will finish cleaning the furnace blower, and then we'll use our duct camera to inspect and make sure the ducts are completely cleaned.
Finally, our technician seals any openings made in the ductwork and restores your system to service, leaving you with cleaner, healthier air in your home. Breathe easier with Mold and Air Duct Pros.
Dryer maintenance might not always be at the top of your mind, but it’s something we think about a lot. Properly caring for your dryer can mean energy savings, a longer lifespan for your dryer, and a safer home environment. As air duct professionals, one of the questions people ask us most is how often to clean a dryer vent. But the answer isn’t as simple as it may seem.
Our service: Dryer vent cleaning is included in our full-service air duct cleaning package. We do not offer dryer vent cleaning as a standalone service.
Dryer Exhaust Vent vs. Lint Trap
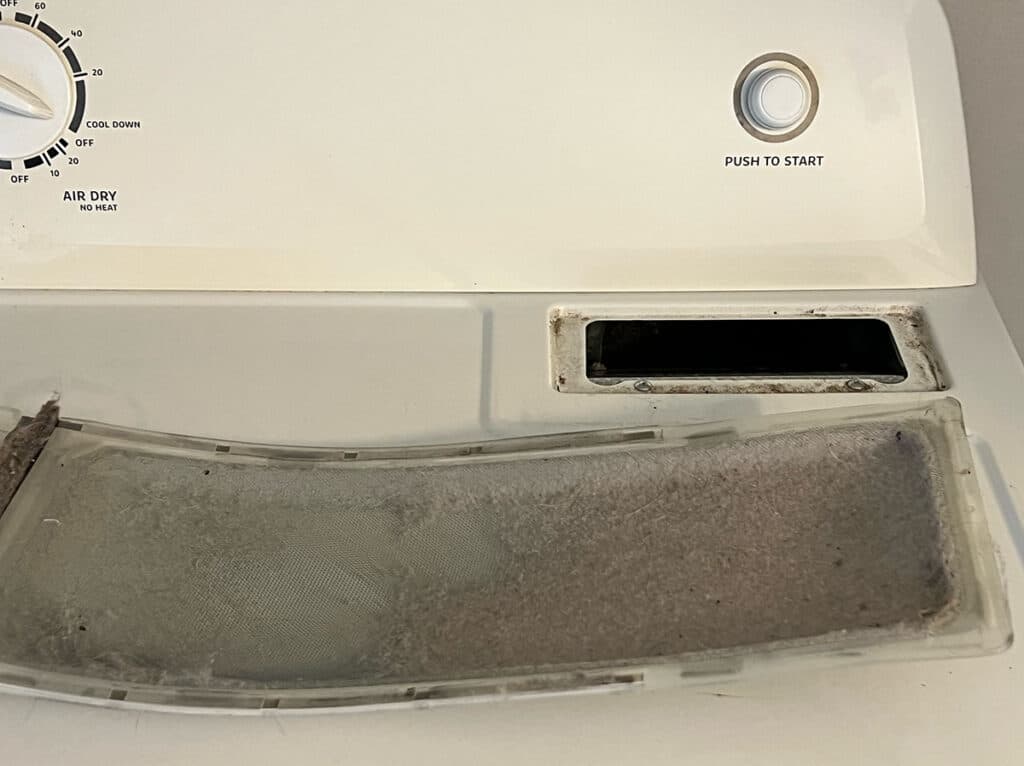
Before we begin, let’s distinguish between a lint trap and a dryer exhaust vent. A lint trap is the wire netting that slides in and out of your dryer and collects lint while you dry your clothes. You likely clean it out before or after every cycle.
On the other hand, the dryer vent is the exhaust and duct system that carries heat from your dryer outside of your home. It requires less frequent cleaning than a lint trap but should never be ignored. It is also separate from your HVAC ductwork, which is cleaned on its own schedule and for different reasons.

Three Reasons to Clean Your Dryer Vent
Keep Your Home Safe
While having a dryer in your home is a huge convenience, it can also mean danger—especially if you don’t properly maintain it.
According to the United States Federal Emergency Management Agency, over 2,000 residential clothes dryer fires are reported every year. On average, dryer fires cause five deaths, 100 injuries, and $35 million in property loss annually. And the number one leading cause of residential dryer fires? Failure to clean dryer vents.
Costs and Energy Savings
Not only does infrequent cleaning of your dryer vent pose a threat to your safety, but it can also affect your wallet. Dryer vents that haven’t been cleaned will clog with lint and dust, meaning it takes longer to dry your clothes. Though you may not think much of it, ignoring this issue may lead to rising energy costs.
Dryer Warranty
Several appliances come with standard warranties that cover repairs within a specific time frame. However, consumers can unintentionally void their warranties if they fail to care for their appliances properly. For example, some manufacturers require yearly dryer vent cleaning for a dryer to remain under warranty.
How Often to Clean Your Dryer Vent
We recommend cleaning your dryer vent at least once every year. This ensures regular maintenance of your dryer’s exhaust system and reduces the likelihood of a dryer fire.
Of course, not every dryer is built the same, and not every household uses its dryer in the same way. For example, a family of six doing a load or two of laundry every day will need to clean its dryer vent more frequently than a single-person household.
If you’re unsure whether to clean your dryer vent more frequently, look for these signs.
- A burning smell. If you notice a burning smell when you use the dryer, stop using it and have the dryer and vent checked for lint, debris, or another problem.
- Clothes take longer to dry. One of the first signs that your dryer vent needs cleaning is if your clothes take longer to dry after each use.
- It hasn’t been cleaned recently. If it’s been almost or more than one year since you last cleaned your dryer vent, that’s a tell-tale sign that it’s time to clean it out.
Can I Clean My Dryer Vent Myself?
While we always recommend hiring professionals to clean a dryer vent and ensure maximum safety for your family and the care of your dryer unit, we understand that not everyone may want or have that option. Follow these steps to clean your dryer vent by yourself.
(Disclaimer: the information in the following steps is strictly informational. If you decide to attempt the following yourself without a professional, you do so at your own risk and you will be liable for any damages or harm that may incur as a result. If your dryer is still under a warranty, you will be responsible for the warranty implications of performing service maintenance without the presence of a professional. We recommend you consult your dryer manufacturer if further warranty information is required. If you are renting or a part of an HOA, you should contact your landlord/office before performing service maintenance without a professional present.)
What You Will Need
- Thick Protective Gloves – The metal dryer exhaust can have a sharp metal edge; safety first.
- Protective Long Sleeves – Before reaching into a vent, ensure your arms are adequately protected from sharp metal edges.
- Flat-head screw driver and/or pliers – depending on how the exhaust vent is secured to your unit, you may need either a flat-head screw driver or standard pliers to remove the hose clamp.
- Shop vac or vacuum cleaner – Shop vacs are preferable here as there may be large pieces of lint that may clog a standard household vacuum cleaner. However, you may use a standard vacuum if that is all you have access to.
- Flexible Brush / brush vacuum extension – to effectively remove all possible lint from the exhaust, it is important to have a flexible brush fit can run through the entire length of your dryer’s exhaust vent. There are brushes sold specifically for cleaning dryer vents. (For brushes built specifically for cleaning dryer vents, it is critical to follow the instructions provided by the brush manufacturer.)
- Broom and dustpan – There may be large pieces of lint that come out of the exhaust hose that are too large for your vacuum (or even too large for your shop vac). If that is the case, it is nice to have a broom handy.
Instructions
- Disconnect your dryer – Before you begin, make sure to turn off the electrical breaker to your dryer. This is recommended over simply unplugging your dryer because many dryers run on 220v and this can be dangerous to unplug manually on a live 220v circuit. If you use a gas dryer, shut off the gas valve by the dryer to ensure no gas leaks while moving the unit around. If the electrical line is preventing the dryer vent from being accessible, you may also unplug that now.
- Remove and clean the dryer duct. Next, disconnect the duct from where it enters the wall and the back of your dryer. Clear out the duct by hand and remove any lint or dust from openings in the dryer or wall.
- Check the vent. Find where your exhaust vent exits your house and ensure the area is clean and free from obstructions.
- Clean out the vent. Grab a flexible brush with an extendable handle to clean your vent. Carefully work the brush into the vent while clearing any dust or lint. You should clean the entire length of the vent as best you can. If you have a vacuum with a hose attachment, use it to clean out the vent after you’ve passed through with the brush.
- Remove any extra dust or lint. Take this time to clean your dryer and remove any additional dust or lint from surrounding areas. You should also clean out the lint trap each use.
- Piece the exhaust hose back together – This is a critical step. If any of the connections are not properly reinstalled, you risk venting warm, damp exhaust air inside your home. Excess moisture can contribute to mold growth. Fit all the connections back together and make sure the hose clamps are securely fastened.
- Reconnect the power source and turn on the gas (if applicable) – remember to plug the unit back in and if it is a gas unit, be sure to turn the gas valve back on (the valve will be perpendicular to the gas pipe if the valve is off, and it will appear parallel to the pipe if the gas is turned on).
- Test the dryer’s functionality and connections – First, test the dryer without heat. Visually inspect for any areas where the hose may have become detached. Feel for air around the connections and resecure the hose clamps as needed. Escaping air could mean there is still an obstruction or a connection is not secure. Next, test with heat. If it is a gas unit and no heat is detected, double-check the gas valve. After heat is detected and the exhaust hoses remain connected without air leaks, the cleaning is complete.
Remember, even though it can be very beneficial to properly clean your own dryer vent periodically, it is still important to have a professional clean and inspect this at least once a year because there may be buildups of lint that are not detectable or reachable without professional vent cleaning equipment.
Hiring a Pro
For Cleveland-area homeowners, we include dryer vent cleaning in our full-service air duct cleaning package. Contact our team to ask about the package or schedule your duct cleaning.