
Ever wonder how the pros tackle mold cleanup? Or what to expect when you hire a Cleveland pro for mold cleanup in your own home?
We at Mold and Air Duct Pros can only vouch for our own mold removal process. And to be honest, we think it’s one of the best in the business. In this post, we’ll break down our 10-step remediation process — from that initial chat to the final evaluation, we’ve got every detail covered.
Ready to learn more? Let’s dive into how we get your home mold-free and keep it that way.
Table of Contents
Step 1: Free Phone Consultation
It all begins with a thorough and free phone consultation. This initial step is our chance to connect with you. It helps us understand the details of your space and the full scope of the mold issue at hand. Your insights during this conversation are very important, giving us a personal understanding of your unique situation.
We will get into details about your building — its size, layout, and any specific areas of concern. We will also want to learn about who is living in the space. Are there individuals with respiratory conditions, allergies, or other health concerns? This information guides our approach, ensuring that we address not just the mold but also prioritize the well-being of everyone involved.
Consider this conversation as the foundation of our partnership. By openly sharing information during this free phone consultation, you’re giving us the power to design a mold cleanup plan that meets your needs perfectly. So, let’s chat! Together, we’ll come up with a solution to get your home mold-free.
Step 2: Mold Inspection
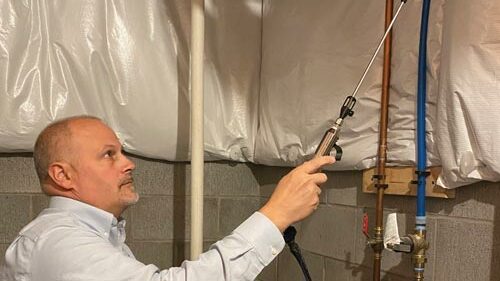
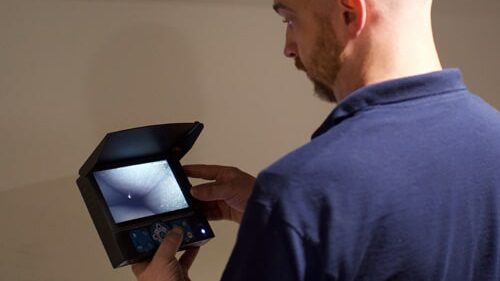
With information gathered from our phone conversation, we we will be ready for the next step: Mold Inspection. Handling mold needs a careful approach because it can be hard to find and catch, and that’s where our cutting-edge technology, InstaScope, comes into play. Upon getting your approval, we conduct a thorough mold air analysis in every room.
As we go room by room, you might wonder, “What exactly are we looking for, and how does this shape the plan?”
We are looking for various indicators of mold, viruses, bacteria, and pollen using InstaScope. This technology provides instant results, offering a real-time snapshot of the mold situation. The results help us identify potential risks and shape a personalized mold remediation plan that addresses specific issues in your environment. Analyzing the air in each room is crucial because mold spores are not visible to the naked eye and can travel through buildings with airflow, even hiding behind walls and inside air ducts. This detailed analysis helps us plan our next move – crafting a safe and effective mold cleanup plan tailored to your specific needs.
In addition to the data gathered by InstaScope, our experienced inspectors use their senses and years of expertise. Visual cues, odors, and their extensive knowledge contribute to their complete understanding of the mold situation in your home.
Step 3: Cover and Protect
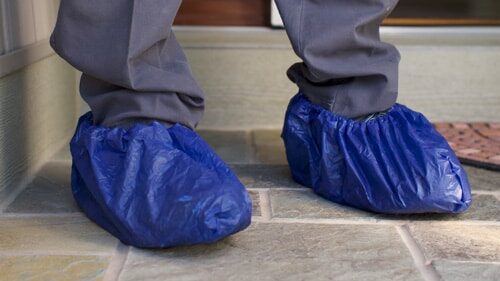
After the mold inspection, we are ready to get started! Once we get into your home, our first step is going to be covering and protecting your space. Respecting your home is a top priority, and that’s why we take special care in protecting your floors and belongings during the mold cleanup process.
We will work to build a shield for your home – making sure that no harm comes to your flooring or possessions. We use a combination of measures to cover your home during the mold remediation process. This includes the strategic use of plastic sheeting to cover and protect your floors and belongings. Our goal is to not only eliminate mold but to do so in a way that prevents any impact on the rest of your living space.
Step 4: Containment Barriers
As we progress in the mold cleanup process, the next critical step is to set up containment barriers. These barriers are strategically placed in areas with high mold counts and visible growth. The purpose? To prevent the mold from spreading to other areas of your building.
We create a designated zone for mold cleanup with the use of plastic sheeting and other material as necessary. We also take care to cover vents and other openings to prevent the spread of mold particles to unaffected areas. This contains the issue to specific areas and stops any accidental spreading during the remediation process. We also take care to cover vents and other openings to prevent the spread of mold particles to unaffected areas.
Step 5: Air Filtration
With containment barriers securing the designated zones, our focus turns to cleaning out the air. It’s important to start here because airborne mold is so easily spread. High-Efficiency Particulate Air (HEPA) filtration devices are the heroes here — they are strategically positioned within the containment areas before we move forward.
HEPA filters are exceptionally good at trapping microscopic particles, including mold spores. This makes sure that the air circulating within the contained spaces is purified. These devices capture airborne contaminants, and work to create an environment that is not only mold-free but has better air quality than before!
Using HEPA filtration adds a crucial layer to our remediation strategy, going beyond surface mold cleanup to take care of potential airborne mold particles. It’s a step we take not only to remove visible mold but also improve the air quality in your home or building. This aligns with our commitment to proactive measures – we want to leave your home better than before.
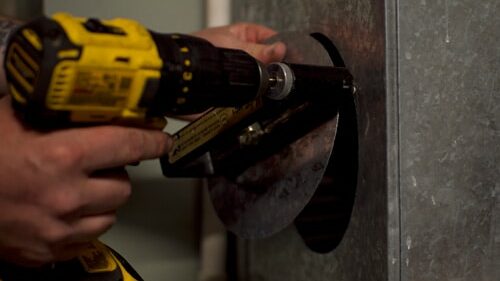
Step 6: Demolition & Removal (If required)
Sometimes, effective mold cleanup requires carefully removing and demolishing contaminated materials. This is not a one-size-fits-all step—it depends on how severe the mold is and how much the materials are affected. If demolition is needed, it’s executed carefully, removing only what is necessary. This approach keeps disruption to a minimum while efficiently tackling the mold problem.
The decision to proceed with demolition comes only after the thorough assessment described in earlier steps. If materials like drywall or flooring are heavily contaminated and can’t be adequately cleaned, removal becomes the best choice. It’s a strategic approach, ensuring that the cleanup is both effective and efficient.
Partnering with Keselman Construction Group, Mold and Air Duct Pros can give you a seamless transition from mold cleanup to any necessary damage restoration. Having an experienced construction team in-house is a huge advantage when reconstructing after demolition and removal.
Step 7: HEPA Vacuum
After the controlled demolition and removal, the next step is the use of a High-Efficiency Particulate Air (HEPA) vacuum. This specialized vacuum is used to clean and capture any remaining mold particles on surfaces such as walls, ceilings, and floors. This makes sure that every nook and cranny is thoroughly cleaned.
The HEPA vacuum is a powerful tool designed to trap even the tiniest mold particles, which makes it an important part of a comprehensive mold cleanup.
There are two main reasons for using a HEPA vacuum:
- Thorough Cleanup: After demolition and removal, surfaces may still contain traces of mold. The HEPA vacuum meticulously cleans these surfaces, leaving no room for stubborn mold.
- Preventing Cross-Contamination: By using a HEPA vacuum, we lower the risk of cross-contamination. This is crucial in protecting the integrity of unaffected areas and preventing the accidental spread of mold particles during the cleanup process.
Step 8: React/Extract
Next up, we use a professional-grade system known as React/Extract. This system utilizes the power of reacted chemistry to cause contaminants, including mold, to be driven to the surface.
It is a targeted approach – React/Extract works specifically on the affected surfaces, pulling contaminants (at a microscopic level!) to the forefront. These contaminants are collected in a foam that will sit on top of the surface until removed.
This step is crucial for dealing with any remaining particles that are still hanging on after the mold cleanup. Using this technology gives us precision as we finish up the process.
Step 9: Wet Vacuum Extraction
The final step to the actual mold cleanup process is using wet vacuum extraction. After applying React/Extract in the previous step, we perform wet vacuum extraction over the foam produced by the React/Extract system. Wet vacuum extraction completely gets rid of contaminants brought to the surface. At this point, all mold has been efficiently and thoroughly removed, and you can breathe easier.
Step 10: Post-Remediation Evaluation
We don’t just come in, remove the mold, and assume that it worked.
After completing the entire mold cleanup process, we go back in for more testing. Our experts perform Mold Clearance Testing to guarantee that your space is mold-free. We do not feel that our job is done until we can give you hard proof that the affected surfaces and air quality in your home are completely cleaned up. And if we find any remaining mold? We take care of it.
Conclusion: Let’s Do Some Mold Cleanup!
We hope that we’ve given you a clear idea of what to expect from our mold cleanup process. We are confident that it’s among the best out there. In fact, we trust it (and our team of pros) so much that we offer a 100% Mold Remediation Service Guarantee.
So, are you looking for a Cleveland mold pro that you can trust? Schedule your free phone consultation now, and let’s design a solution tailored to your unique needs. Together, we’ll make sure your home is a mold-free, healthy space for you and your family.